This purpose of this tutorial was just to become accustomed to how this will work on my final model.
The first step was to produce various lip targets to reflect the different phonemes:
It is possible to just have a mouth open and mouth closed which may look fine however it is not as effective. Next, the Morpher tool was used on each of the targets and each mouth is adjusted to fit the phonemes.
 |
| Creating the lips from a torus shape |
 |
| Lips before the morpher tool is applied |
It is possible to just have a mouth open and mouth closed which may look fine however it is not as effective. Next, the Morpher tool was used on each of the targets and each mouth is adjusted to fit the phonemes.
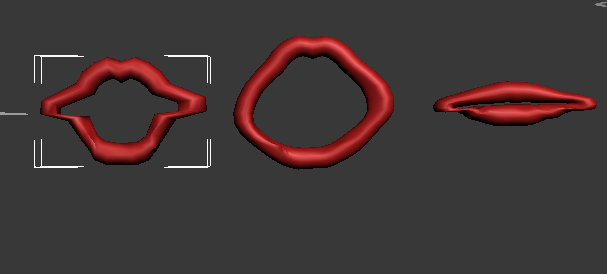 |
| Examples of different phonemes |
Now I have to sync the morpher with a voice clip. I opened the dope sheet (Graph Editors > Dope Sheet) and in the side panel under "World", I double clicked on "Sound" added my sound file. A small plus sign appeared next to the sound channel which is a good indictation that the file has been imported successfully. If you maximise all the submenus, you can see the waveform in the dope sheet. In order to make it easier for me to animate my lips, I kept the waveform easily available.
| The waveform |
Next, I animated using keyframes and matched it up with the morphs.
When I create my character, I will be using a beak instead of lips. This will be much easier because ultimately the beak will just open and shut. The corners of the beak will change with different sounding words however it will not move as much as lips do. I also discovered during this exercise that it is very difficult to make obvious sounds with just lips, as teeth and a tongue are also used during every day speech. This will need to be considered when animating my final project.
When I create my character, I will be using a beak instead of lips. This will be much easier because ultimately the beak will just open and shut. The corners of the beak will change with different sounding words however it will not move as much as lips do. I also discovered during this exercise that it is very difficult to make obvious sounds with just lips, as teeth and a tongue are also used during every day speech. This will need to be considered when animating my final project.
No comments:
Post a Comment